Did you know that kitchen cabinet resurfacing is a cost-effective way to give your kitchen a fresh new look? Studies show that resurfacing your cabinets can cost up to 50% less than replacing them entirely. So if you’re looking to update your kitchen on a budget, resurfacing is the way to go.
With the right materials and techniques, you can transform your outdated cabinets into beautiful, modern ones that you’ll be proud to show off to your friends and family. And the best part? You don’t have to do it alone.
In this article, we’ll guide you through the entire resurfacing process, from understanding the technique to choosing the right materials, preparing your cabinets, and maintaining them afterward. Get ready to give your kitchen a fresh new start and create a space that truly feels like home.
1. Understanding the Resurfacing Process
Looking to give your kitchen cabinets a fresh new look? Discover the easy and cost-effective process of resurfacing them!
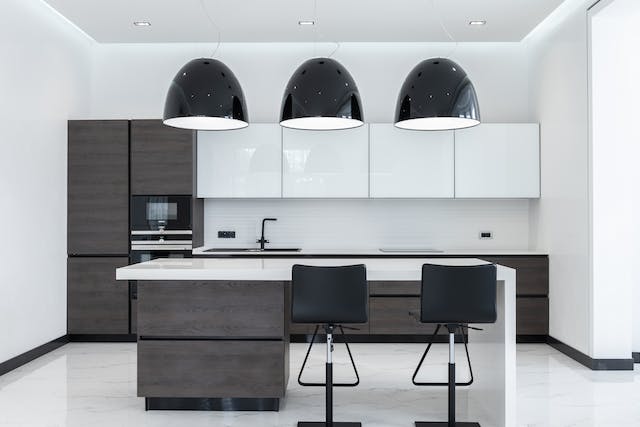
When it comes to updating your kitchen, resurfacing your cabinets is a fantastic option that can transform the entire space without breaking the bank. By resurfacing, you can keep the existing cabinet boxes, but give them a whole new look by replacing the doors, drawer fronts, and hardware. It’s a great way to breathe new life into your kitchen and make it feel more modern and inviting.
The resurfacing process starts with removing the old doors and drawer fronts. Then, the cabinet boxes are thoroughly cleaned and prepped for the new surfaces.
The next step is selecting the materials and finishes you want for your cabinets. There are a wide variety of options available, from sleek and contemporary to warm and rustic. Once the new doors and drawer fronts are installed, the hardware is added to complete the transformation.
Resurfacing your kitchen cabinets is a simple and efficient way to update your kitchen without the hassle and cost of a full remodel. Plus, it allows you to customize the look of your cabinets to fit your style and taste.
So, why wait? Give your kitchen the fresh new look it deserves with the easy and cost-effective process of resurfacing your cabinets!
2. Choosing the Right Materials for Your Cabinets
To ensure your cabinets have a captivating and cost-effective upgrade, opt for materials that are both durable and delightful.
When it comes to choosing the right materials for your cabinet resurfacing project, it’s important to consider both functionality and aesthetics. You want materials that can withstand the wear and tear of daily use, while also adding a touch of beauty to your kitchen.
One popular material choice for cabinet resurfacing is laminate. Laminate is known for its durability and versatility. It comes in a wide range of colors and patterns, allowing you to achieve the look you desire. Additionally, laminate is easy to clean and maintain, making it a practical choice for busy kitchens.
Another option to consider is wood veneer. Wood veneer is a thin layer of real wood that is applied to the surface of your cabinets. It provides a natural and warm appearance, while also adding a layer of protection to your cabinets. Wood veneer is available in a variety of wood species and finishes, allowing you to create a custom look that reflects your style.
No matter which material you choose, make sure it complements the overall aesthetic of your kitchen. By selecting durable and delightful materials, you can create a space that is not only functional but also inviting and cozy.
3. Preparing Your Cabinets for Resurfacing
Before you begin the process of transforming your cabinets, take a moment to prepare them for their stunning makeover. Preparing your cabinets for resurfacing is an essential step to ensure a flawless and long-lasting result.
Start by removing all the items from your cabinets, and creating a clean and empty canvas for your project. This will also allow you to assess the condition of your cabinets and make any necessary repairs before moving forward.
Next, give your cabinets a thorough cleaning. Use a mild detergent and warm water to remove any grease, dirt, or grime that may have accumulated over time. Be sure to dry them completely before proceeding to the next step.
Once your cabinets are clean and dry, it’s time to sand them down. This will create a smooth surface for the new finish to adhere to. Use fine-grit sandpaper and gently sand in the direction of the wood grain. Be careful not to sand too aggressively, as you don’t want to damage the wood.
After sanding, wipe away any dust with a damp cloth and allow the cabinets to dry once again. Now, you’re ready to apply the new finish or paint of your choice. Follow the manufacturer’s instructions for application, and enjoy the process of transforming your cabinets into beautiful focal points in your kitchen.
4. Applying the Resurfacing Technique
Once you’ve prepped your cabinets, it’s time to get down to business and give them a fresh new look. Applying the resurfacing technique is an exciting and transformative process that will completely change the appearance of your kitchen cabinets.
First, gather all the necessary materials: sandpaper, a paint roller, a brush, and the resurfacing product of your choice. Start by sanding the cabinets to create a smooth surface for the new finish to adhere to. This step is crucial for achieving a professional-looking result.
Next, use a paint roller to apply the resurfacing product evenly across the cabinet doors and frames. Don’t forget to use a brush for any hard-to-reach areas. Allow the first coat to dry thoroughly before applying a second coat for a more durable finish.
As you apply the resurfacing product, take a moment to imagine the transformation taking place in your kitchen. Your cabinets will look brand new, and you’ll feel a sense of belonging every time you step into your kitchen. So go ahead, embrace the process, and enjoy the satisfying feeling of giving your cabinets a fresh new look.
5. Maintaining and Caring for Resurfaced Cabinets
Get ready to show off your stunning new cabinets by learning to maintain and care for them properly. After the resurfacing process is complete, it’s important to take the necessary steps to keep your cabinets looking fresh and beautiful.
First, make sure to clean them regularly with a mild soap and water solution. Avoid using harsh chemicals or abrasive cleaners that could damage the surface. Instead, opt for a soft cloth or sponge to gently wipe away any dirt or grime.
In addition to regular cleaning, it’s also essential to handle your cabinets with care. Avoid banging or slamming the doors, as this can cause dents or scratches. Use gentle pressure when opening and closing them, and always be mindful of any sharp objects that could scratch the surface.
If you do accidentally damage the cabinets, don’t worry. Most resurfaced cabinets can be easily repaired with a touch-up kit or by contacting a professional.
To maintain the longevity of your resurfaced cabinets, it’s important to avoid excessive moisture or humidity. Keep them away from areas prone to water splashes, such as near the sink or dishwasher. If you notice any signs of water damage, such as warping or bubbling, address the issue promptly to prevent further damage.
By following these simple maintenance tips, you can ensure that your resurfaced cabinets remain in top condition for years to come. Show off your stylish kitchen and enjoy the sense of belonging from having a space that reflects your style and taste.
Frequently Asked Questions
How long does the resurfacing process typically take?
The resurfacing process typically takes a few days. You’ll need to remove the cabinet doors and drawers, clean and sand the surfaces, apply the new finish, and let it dry.
What is the average cost of kitchen cabinet resurfacing?
The average cost of kitchen cabinet resurfacing is around $2,500. It’s like giving your cabinets a fresh coat of paint, giving your kitchen a brand-new look without breaking the bank.
Can cabinet hardware be replaced during the resurfacing process?
Yes, cabinet hardware can be easily replaced during the resurfacing process. It’s a great opportunity to update the look and feel of your cabinets while giving them a fresh new surface.
Is it possible to change the color of the cabinets during resurfacing?
Yes, it is possible to change the color of your cabinets during the resurfacing process. You can give your kitchen a fresh, new look by choosing a different color that suits your style and creates a sense of belonging in your space.
Are there any specific cleaning products that should be avoided when maintaining resurfaced cabinets?
Avoid using harsh cleaning products on your resurfaced cabinets as they may damage the finish. Stick to mild, non-abrasive cleaners and avoid abrasive scrub pads to ensure your cabinets stay looking great for years to come.
Conclusion
You’ve learned all about kitchen cabinet resurfacing. Now it’s time to jazz up those old cabinets and give them a fresh new look. With the right materials and a little bit of elbow grease, you can transform your kitchen into a culinary masterpiece. Just remember to maintain and care for your resurfaced cabinets, so they can continue to shine like a star in your culinary galaxy.nnHappy resurfacing!