Are your kitchen cabinets looking dull and lifeless? It’s time to give them a makeover that will make them shine like a star!
Imagine your cabinets as a blank canvas, waiting for your artistic touch. With the right tools and expertise, you can transform them into a masterpiece that will make your kitchen the envy of all.
In this article, we will guide you through the process of staining your cabinets like a pro. You’ll learn how to prepare your cabinets, choose the perfect stain, and remove the old finish to create a smooth surface.
We’ll show you the step-by-step process of applying the stain and provide tips for sealing and protecting your cabinets for long-lasting beauty.
Get ready to unleash your inner artist and create cabinets that will make you feel a true sense of belonging in your own kitchen.
Let’s get started!
Preparing Your Cabinets for Staining

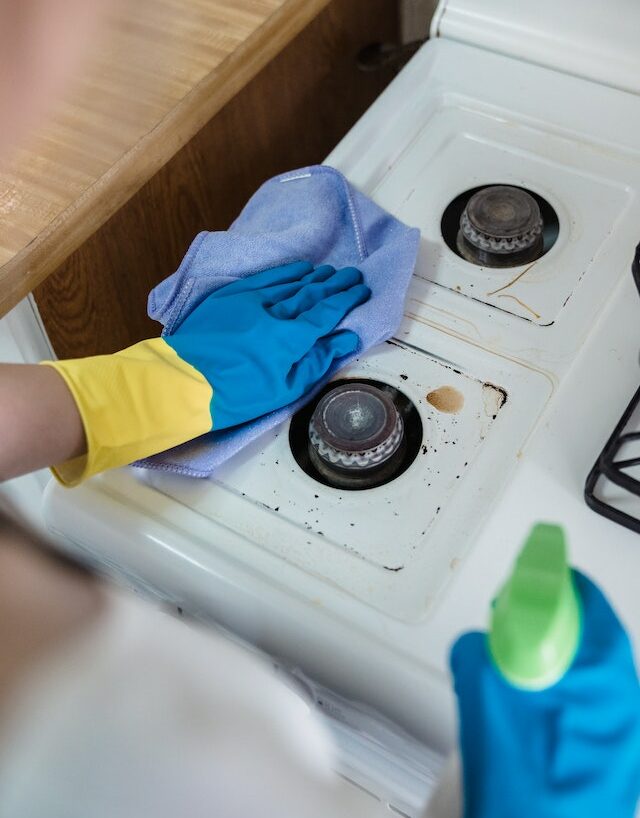
Get ready to transform your cabinets into stunning works of art by prepping them like a pro! You want your cabinets to look amazing, right? Well, the first step is to make sure they’re clean and free from any grease or grime. Grab a bucket of warm, soapy water and a sponge, and give those cabinets a good scrub. Don’t forget to clean the inside too!
Once your cabinets are clean, it’s time to remove the doors and hardware. This will make it easier to stain them evenly and ensure no drips or smudges. Grab a screwdriver and carefully remove the hinges and handles. Be sure to keep all the hardware in a safe place so you don’t lose anything.
Now that your cabinets are clean and the doors are off, it’s time to sand them down. This will help the stain adhere better and give your cabinets a smooth finish. Grab some sandpaper, preferably a medium-grit, and start sanding in the direction of the wood grain. Don’t forget to sand the edges and corners too!
After sanding, wipe away any dust with a damp cloth. This will ensure a clean surface for the stain to adhere to. Now you’re ready to move on to the next step: applying the stain!
Choosing the Right Stain for Your Cabinets

Select the perfect shade to make your cupboards shine with superb style. When choosing the right stain for your cabinets, it’s important to consider the overall look and feel you want to achieve in your kitchen.
Here are three key factors to keep in mind:
- Your personal style: Think about the atmosphere you want to create in your kitchen. Do you prefer a warm and cozy feel? Or maybe a more modern and sleek look? The stain color you choose should reflect your personal style and contribute to the overall aesthetic of your space.
- The color of your kitchen: Take into account the existing color scheme in your kitchen. Consider the wall color, flooring, and countertop materials. It’s important to choose a stain that complements these elements and creates a cohesive and harmonious look.
- The type of wood: Different types of wood absorb stain differently, resulting in variations in color and intensity. Consider the type of wood your cabinets are made of and how the stain will interact with it. You may want to test a small area before committing to a particular shade.
By carefully considering these factors, you can choose the perfect stain for your cabinets that will enhance the beauty of your kitchen and create a sense of belonging in your home.
Removing the Old Finish

Once you’ve decided on the ideal stain for your cabinets, it’s essential to address the task of removing the old finish to ensure a flawless transformation. Don’t worry, you’ve got this!
Start by gathering the necessary supplies: a protective mask, safety goggles, gloves, sandpaper, and a chemical stripper. Safety first!
Begin by protecting yourself by wearing a mask, goggles, and gloves. Then, carefully sand the surface of your cabinets. This will help the chemical stripper penetrate the old finish and make it easier to remove. Remember, slow and steady wins the race!
Next, apply the chemical stripper according to the manufacturer’s instructions. Be sure to work in a well-ventilated area and avoid any open flames. Let the stripper sit for the recommended amount of time, usually around 15 minutes.
Once the stripper has done its magic, use a scraper or a putty knife to gently remove the old finish. Take your time and be patient. You want to avoid damaging the wood underneath.
Wipe down the cabinets with a clean cloth to remove any residue. You’re now ready to move on to the next step in your cabinet-staining adventure!
Remember, this process takes time and effort, but the end result will be worth it. You’ll have cabinets that look like they were stained by a pro. Keep going, and soon you’ll achieve the transformation you’ve been dreaming of!
Applying the Stain to Your Cabinets
Now it’s time to work your magic and give those cabinets a stunning new look with a flawless application of the chosen stain. You’ve already removed the old finish, so you’re one step closer to achieving the beautiful cabinets you’ve always dreamed of. Let’s get started!
First, make sure to thoroughly clean the cabinets with mild detergent and water. This will remove any dust or debris that could interfere with the staining process. Once they’re clean and dry, grab a clean cloth and put on a pair of gloves to protect your hands.
Next, dip the cloth into the stain and start applying it to the cabinets in long, even strokes. Make sure to follow the grain of the wood for a more natural look. Don’t be afraid to apply a generous amount of stain, as that’ll help achieve a richer color. Work in small sections at a time to ensure an even application.
After applying the stain, let it sit for a few minutes to penetrate the wood. Then, use a clean cloth to wipe off any excess stains. This’ll prevent the cabinets from looking blotchy or uneven. Allow the stain to dry completely before moving on to the next step.
Now step back and admire your handiwork! You’ve successfully applied the stain to your cabinets, giving them a stunning new look. The color and richness of the stain bring warmth and beauty to your kitchen, creating a space that feels inviting and cozy. Enjoy your beautiful cabinets and the sense of accomplishment that comes with a job well done!
Finishing Touches: Sealing and Protecting Your Cabinets
To ensure the longevity of your newly stained cabinets, it’s essential to properly seal and protect them with a high-quality finish. Did you know that using a durable topcoat can increase the lifespan of your cabinets by up to 10 years? By taking this extra step, you’ll not only enhance the beauty of your cabinets but also protect them from everyday wear and tear.
When it comes to choosing a finish, opt for a polyurethane or lacquer product that’s specifically designed for cabinets. These finishes provide a strong, protective layer that’s resistant to moisture, stains, and scratches. Before applying the finish, make sure to clean your cabinets thoroughly and ensure they’re completely dry.
To apply the finish, use a clean brush or a foam applicator pad. Start by coating the edges and corners, then move on to the larger surfaces. Apply thin, even coats, and allow each coat to dry completely before applying the next one. Depending on the product, you may need to sand lightly between coats to achieve a smooth finish.
Once you’ve applied the desired number of coats, give your cabinets ample time to cure. This’ll ensure that the finish fully hardens and provides maximum protection. Finally, step back and admire your beautifully stained and protected cabinets, knowing that they’ll last for years to come.
Frequently Asked Questions
What is the best type of wood to use for staining cabinets?
The best type of wood to use for staining cabinets is usually hardwood, such as oak, cherry, or maple. These woods have a smooth surface and take stain well, giving your cabinets a professional and polished look.
Can I stain over old paint or do I need to remove it completely?
Yes, you can stain over old paint, but you need to properly prepare the surface by sanding it and applying a primer. This will ensure that the stain adheres well and gives you a smooth finish.
How long should I wait before applying a second coat of stain?
Wait for the stain to dry completely, usually around 24 hours, before applying a second coat. This ensures a smooth and even finish, giving your cabinets a professional look that you’ll be proud of.
Can I use a brush or do I need to use a cloth to apply the stain?
You can use either a brush or a cloth to apply the stain. Both methods work well, so choose the one that feels more comfortable for you. Just make sure to apply an even coat for a professional finish.
How often should I reseal my stained cabinets to maintain their appearance?
To maintain the stunning appearance of your stained cabinets, it’s essential to reseal them every 1-2 years. This protective layer will keep them looking as fresh as the day you stained them, ensuring a sense of pride and belonging in your home.
Conclusion
So there you have it! You’ve learned how to stain your cabinets like a pro. By following these steps and using the right stain, you can transform your dull cabinets into stunning focal points in your home.
And here’s an interesting statistic for you: Did you know that 80% of homeowners who stain their cabinets themselves are satisfied with the results? So why not give it a try and see the difference it can make in your space?